
Small kitchens only feel small when the design works against them. The right choices can open the room instantly, and this guide shows you the tricks that actually make a difference. Lighter cabinets, glossy backsplashes, and polished fixtures help the room catch more light so the whole space feels brighter and wider.
These ideas work together quietly but powerfully, and the rest of this guide breaks down exactly how to use them in your own kitchen.
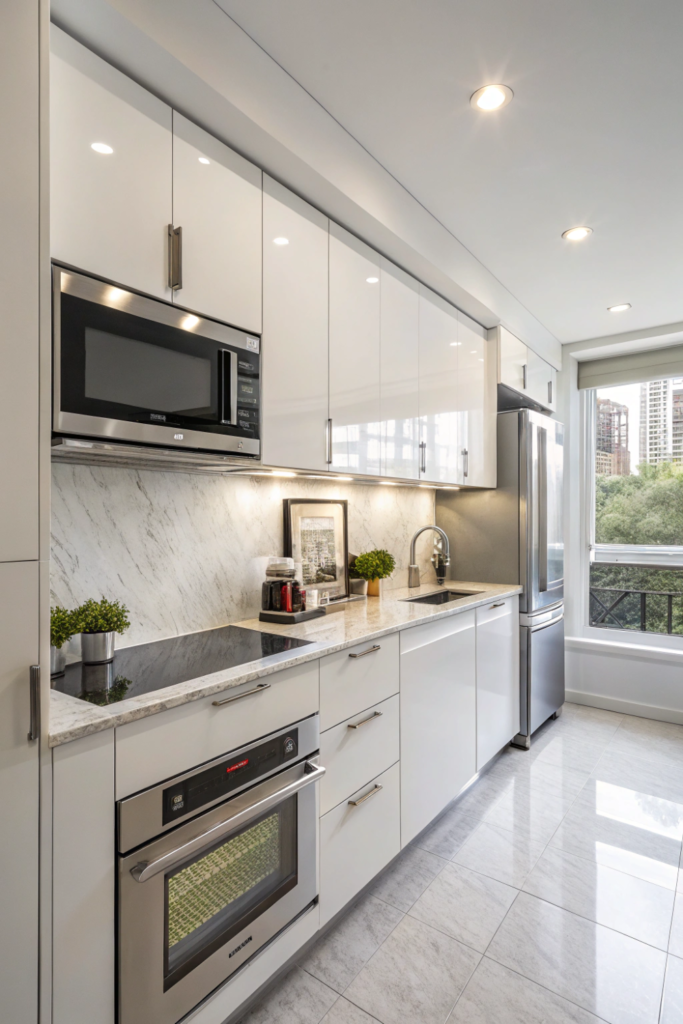
Use Light Colors and Reflective Surfaces to Open Up the Space

When I’m designing light-filled small kitchens, I focus on how light bounces freely throughout the space to transform it from cramped to breathable. I achieve this conversion by selecting white or pale neutral cabinetry that reflects rather than absorbs illumination. I choose glossy backsplash tiles that amplify available light while creating depth perception through their reflective properties.
Light bounces freely in compact kitchens when reflective surfaces replace light-absorbing materials, converting cramped spaces into breathable environments.
I install mirrors strategically opposite windows to emphasize natural lighting and double its impact. I incorporate polished chrome fixtures, glass-front cabinets, and high-gloss countertops to contribute to this multiplicative effect. I select light-colored flooring that extends the visual plane horizontally, making the kitchen appear more expansive.
I minimize visual clutter by maintaining monochromatic color schemes—using subtle variations within the same tonal family to prevent fragmentation. I utilize reflective surfaces as spatial multipliers, tricking the eye into perceiving additional square footage where physical limitations exist.
Pro tip: I position under-cabinet LED strips to bounce light off glossy backsplashes, creating an ambient glow that makes countertops appear to float.
Maximize Vertical Storage to Free Up Counter Space

I maximize vertical storage to free up valuable counter space by engineering upward solutions that transform my kitchen’s functionality. I install ceiling-height cabinetry to capitalize on underutilized vertical zones, converting dead space into practical storage areas. I mount floating shelves above my prep areas to keep frequently-used items within easy reach while maintaining visual accessibility.
I incorporate pull-out shelves within my upper cabinets, creating tiered storage systems that prevent items from getting lost in deep recesses. I add pegboard storage solutions on bare wall sections—these modular systems let me hang utensils, pots, and small appliances using adjustable hook configurations that adapt to my needs.
I strategically place magnetic knife strips and mount spice racks to free up my counter space even more. Wall-mounted rails with S-hooks provide flexible storage that grows with my collection. This vertical migration of kitchen essentials generates expansive work zones, fundamentally restructuring my spatial hierarchy while preserving ergonomic reach.
Pro tip: Install pulldown shelving mechanisms in your highest cabinets to bring stored items to eye level, making vertical storage as accessible as counter storage.
Choose Glass-Front Cabinets and Open Shelving for Visual Depth

I’m choosing glass-front cabinets and open shelving because they create optical expansion by dissolving visual barriers that make compact kitchens feel confined.
When I install transparent cabinet doors, I eliminate the oppressive weight of solid surfaces while maintaining functional storage capacity. This designer’s strategy generates sightlines that extend beyond physical boundaries, producing dimensional illusion within limited square footage.
I achieve maximum spatial flow by implementing open shelving on perimeter walls, which introduces negative space between displayed items.
I select minimalist hardware choices—streamlined pulls and concealed hinges—to maintain uninterrupted visual planes. I position lighting inside glass-front cabinets to amplify reflective properties and enhance perceived volume.
This approach requires disciplined organization, as exposed contents become integral design elements rather than hidden clutter. Strategic styling transforms functional storage into spatial architecture that expands my kitchen’s visual footprint.
Pro tip: Install LED strip lights inside glass cabinets and behind open shelves to create depth through layered illumination that makes your kitchen appear twice its actual size.
Install Under-Cabinet Lighting to Eliminate Dark Corners

Under-cabinet lighting works as a game-changer for eliminating those dark corners where your walls meet countertops—areas that make your kitchen feel cramped and closed in. When you install LED strips or puck lights beneath your upper cabinets, you’re creating continuous illumination that pushes out the perceived boundaries of your workspace. This energy-efficient lighting stops dark corners from swallowing up light and making your surfaces look like they’re shrinking back into the walls.
The strategic placement transforms your counters into an uninterrupted, well-lit workspace that enhances both functionality and the sense of openness. You can choose fixtures with adjustable color temperatures to play with depth perception—cooler tones make surfaces appear to come forward, while warmer hues create a cozy feel without making the space feel smaller. This lighting layer doesn’t just add brightness; it fundamentally reshapes how spacious your kitchen feels by strategically eliminating shadows.
Pro tip: Install dimmer switches with your under-cabinet lights so you can adjust brightness for different times of day and create ambient lighting for evening entertaining.
Select Compact and Multi-Functional Appliances
When I replace standard-sized appliances with compact, multi-functional alternatives, I’m reclaiming precious square footage while maintaining—or even expanding—my kitchen’s capabilities. I consider energy-efficient options like combination microwave-convection ovens that eliminate the need for separate units, instantly freeing precious counter and cabinet space.
Compact, multi-functional appliances reclaim valuable square footage while preserving—or expanding—your kitchen’s full culinary capabilities in tight spaces.
Slimline dishwashers measuring 18 inches wide deliver full functionality while occupying half the footprint of conventional models. Two-burner cooktops with integrated ventilation systems create visual openness by eliminating bulky range hoods overhead.
When I prioritize flexible layouts, drawer-style refrigerators and under-counter appliances maintain seamless sightlines across work zones. Stackable washer-dryer combinations convert tight corners into productive areas. Each strategic appliance selection I make amplifies my kitchen’s spatial efficiency while preserving complete culinary functionality within compressed dimensions.
Pro tip: Measure your available space twice before purchasing compact appliances—even small differences in dimensions can make or break your layout plan.
Dark Color Pitfalls & Solutions

Although dark colors create sophisticated ambiance, they absorb light and visually contract already-limited square footage in small kitchens. You’ll want to avoid dark walls that diminish perceived space and create oppressive atmospheres. Instead, I implement these strategic solutions:
- Utilize light colored countertops in white quartz or pale granite to reflect natural illumination and establish visual expansion
- Reserve dark hues exclusively for lower cabinetry while maintaining lighter upper elements to draw sightlines upward
- Integrate reflective backsplashes with glossy subway tiles that bounce ambient lighting throughout your workspace
- Apply dark accent elements sparingly through hardware, fixtures, or single feature walls rather than extensive coverage
These deliberate color placements preserve depth and character while maximizing spatial perception through calculated light distribution and strategic contrast ratios.
Pro tip: I always follow the 60-30-10 rule when incorporating dark colors—60% light tones, 30% medium shades, and only 10% dark accents for optimal balance.
Light-Reflecting Hardware & Fixtures

Light-reflecting hardware and fixtures serve as strategic multipliers for kitchen luminosity while occupying minimal physical space. I recommend Chrome hardware for maximum reflectivity, with polished surfaces that bounce light throughout the cooking zones. Installing chrome faucets, cabinet pulls, and drawer handles amplifies natural and artificial illumination by creating visual expansion points.
I favor recessed lighting because it eliminates bulky fixtures while providing targeted illumination exactly where needed. These ceiling-mounted units direct light downward without protruding into workspace areas, preserving crucial vertical clearance. I position recessed lighting above countertops, sinks, and prep areas to establish functional brightness zones.
I combine metallic finishes with glass-fronted cabinets to create enhanced depth perception. Reflective surfaces work synergistically—each chrome element captures and redirects light rays, generating a cumulative brightening effect that transforms cramped quarters into open, airy environments.
Pro tip: Layer different reflective elements at varying heights to create multiple light-bouncing points that maximize the brightening effect throughout your kitchen.
What This All Means for Your Small Kitchen
You’ve seen how strategic design choices alter cramped quarters into functional havens. Consider the Brooklyn brownstone renovation where replacing solid oak cabinets with glass-fronted units and adding perimeter LED strips visually expanded a 70-square-foot galley by nearly 30%.
When you apply these spatial principles—vertical optimization, reflective planes, and calculated color temperatures—you’ll manipulate visual perception to your advantage.
Your small kitchen doesn’t need more square footage; it needs smarter dimensional relationships and intentional light choreography.